Thursday, 1 March 2018

Snow White: Part Four

I've got some amazing photos of our 2017 Panto back from the Mercury Theatre.  I believe these were all taken by Robert Workman.  Costumes and set designed by David Shields.

Animal costumes for the Junior Chorus by me.  Snow White's costume by Fran Gyll. 


Nurse Nellie costume by me.  I didn't actually make any wigs this year, we revamped a few old ones for the other Nellie costumes, but this one was made by Ruth Metcalf.   Muddles's costume is by Corinna Vincent.

Nurse Nellie costume by me.  So happy with this one in particular!  I made all that stripey trim myself out of gold braid stitched onto a black fabric backing.

Nurse Nellie's butterfly costume for the finale.  Loved this one as well, especially the headdress, although there aren't any photos that really show it off.  Unfortunately there aren't any production photos of the dressing gown and the mirror costume I made for the dame this year.

The Enchantress's headdress.  Her costumes were all made by Wendy Harrup.  And Carli Norris was a brilliant Enchantress!

The Enchantress's wedding headdress in action.  The King's costume was made by Corinna Vincent.

So, just to reiterate, I made the animal costumes, 5 costumes for Nurse Nellie, 2 headdresses for the Enchantress, 2 more horned headdresses for Nurse Nellie and Muddles (neither of which is shown here), as well as revamping a couple of older wigs for Nellie (adding butterflies to one for the finale, and a turban to another for the end of act one - not shown here.)

All in all, I had a lot on my plate, especially with the animal costumes, which took a lot of trial and error on my part!  I'm very pleased with the final results though, and looking forward to taking on yet another panto at the Mercury in 2018.

In the meantime I will try to do a better job of recording the work I do that's NOT panto-related!  I'm currently working on a pair of completely hand sewn 1780s stays that I started in a class at The School of Historical Dress the other week, so I will definitely blog about that soon.

I've also got this year's Victorian Ball fast approaching.  I've got a client commission to complete for then, as well as a full set of undergarments and a gown for my mum, who will be joining me this year.  Realistically I'm unlikely to have time to complete a new gown for myself, so I will probably wear last years again, and add the trim I didn't get around to doing this time last year.  I never actually posted that dress on my blog, but you can see photos on my website, -here-.  Hopefully I'll actually remember to get pictures at the venue this time around!

Wednesday, 28 February 2018

Snow White: Part Three

For Snow White I made 8 animal costumes in total - 3 squirrels, 3 rabbits, and 2 mice.  As with the rats in last year's Dick Whittington, these were worn by the Junior Chorus.

I made the heads in much the same way as I did last year.  I sculpted a mould over a wig block in bubblewrap, then covered it in tin foil and heated varaform over the top with a hair dryer.  I actually used the same mould for all three types of animal, just padded out the jawline a little more when doing the squirrels, and made the snout pointier for the mice.   The ears were also made from varaform and added afterwards.


The effect we were going for with these was much more 'cutesy' than the evil rats from last year, so this time I gave them big, innocent eyes, which were made from half a plastic bauble each, painted black on the inside.  The lights bouncing off the plastic give them a really lovely life-like effect.


Snouts and inner ears were done in felt, and the fur was attached with hot glue.  Whiskers were made from fishing line and the nostrils drawn on with a sharpie.


I don't have any good behind the scenes photos of the bodies to share here, as the best I have are photos from the fittings with the junior chorus, and it wouldn't be right to upload these.  I created the structure for each body out of fibre glass rods, and reinforced a lot of these with galvanised wire as I was ultra paranoid about them snapping during the run!  I haven't heard otherwise though, so I assume they all survived it.

Excuse my thumb! 
I draped a pattern for the fur over the top, sewed the fur pieces together, then slotted them over the fibreglass "cage" and used cable ties to secure them in place.  Each body closes at the back neck with a buckle.


I made the mice tails exactly the same way as the rat tails from the year before.  The squirrel tails were a much more time consuming beast.  I used a wired foam tube for the base of each one, then ruffled up many many yards of net and attached them in a spiral from the base to the tip.  I didn't trust hot glue to hold them in place by itself, so this meant a lot of awkward hand sewing with a curved needle.  Finally, the net was slashed and chopped into to rough up the look.  This photo shows one prior to roughing up.

Me wearing a squirrel frame, surrounded by the bodies of woodland animals...

Overall I was very happy with the heads, but in two minds about the bodies.  The fibre glass framework had the advantage of making them very lightweight and minimised how hot the performers got in them - but their rigidity wasn't ideal.  The choreography was fairly minimal but even so, I thought the performers did look a little awkward when trying to kneel down on stage.
The other, more widely used option for full body suits is to pattern the base in plastazote foam, although this obviously makes them a lot warmer to wear.  I'd like to give this a go in the future just so I can compare both styles, and in the meantime I'll continue to mull over other ways of creating the ideal animal suit that's both lightweight AND flexible.  One day I'll crack it!

In other news, I may be making a cow for Jack and the Beanstalk this year, so stay tuned for that!

Monday, 26 February 2018

Snow White: Part Two

Snow White closed at least a month and a half ago, so it's probably about time I share some more photos on here.  I've requested some promotional shots from the theatre, but in the mean time here are more of mine.  You'll have to excuse my poor quality camera phone, as well as the fact that the dresses all made for a man with a 40" chest are being shown on a size 8 female mannequin.

I made 5 costumes for the dame this year.  First up:

Nurse Nellie's "Basic" - or, the main costume she wears in Act 1

The 'waterfall' back drapery is my favourite part.

It's an all-in-one dress - even the crinoline is attached - with a CB zip for easy quick change.

Nellie's "Mirror" dress
A classic scene, in which Nurse Nellie and Muddles both end up hiding behind the Enchantress's magic mirror, and hilarity ensues as they each pretend to be her reflection.  Both wear an exaggerated version of the Enchantress's gown and headdress.


Me testing out the pointy shoulders!  They're made with a layer of eva foam underneath to support the shape.

Nellie's End of Act 1 Dressing Gown.

A simple shape but sewing on all that feather boa took a lot longer than I care to admit!

Nellie's "Hunting, or Riding" dress. 
Very much inspired by 18th century redingotes, but with smatterings of Victorian in the hoop shape and upper sleeves.  That's the fun thing about panto, it's all a big mash up!  Worn when Nellie et al go to the forest to look for Snow White.  

This is probably the one I'm most proud of as it had the most fiddly details. 


I was also pleased with all the pattern matching I managed on a quilted fabric.


And finally, Nellie's "Walkdown" - the name given in panto to every character's finale costume as they "walk down" and take their bow.


And the wig.  I didn't actually make the wig itself, but I did add the butterflies.

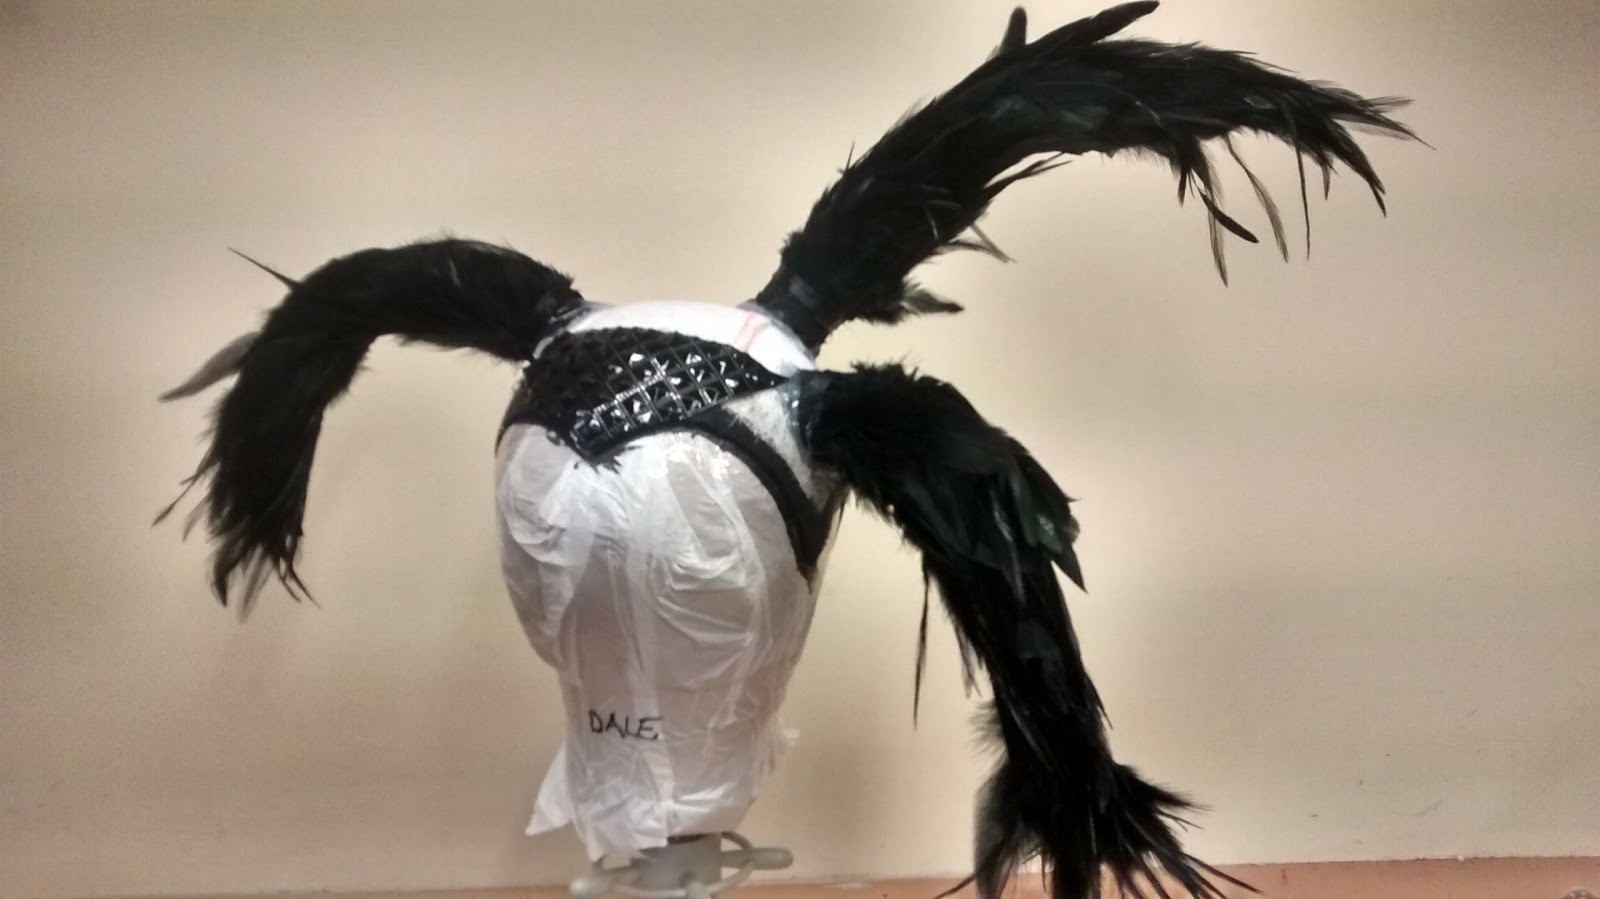
The other headdresses I made were the Enchantress's pale blue wedding henin, which you can see at the end of my previous post, and her main horned headdress, which she wears for most of the show.  I also made two humourous versions of this for Nellie and Muddles to wear in the mirror scene.

She wears interchangeable cowls with this; black and purple, depending on which dress she's wearing.  I was responsible for the structure of the headdress but the decorative details on this one were mostly the designer's (David Shields) handiwork.

Nurse Nellie's version, not quite finished here (needs more bling!).  The skeleton's pose was my idea...

Annoyingly this is the most complete photo I have of Muddle's version.  I was going for a jester look with the horns in this one.  You can still see the white of the fosshape base underneath.  Each base was blocked on a wig block padded to the size of the actor's head.
And I'll save the animals for another post as this one is getting a little unwieldy.

Also, excitingly, we've been nominated for best costume design in the Great British Panto Awards!  Well done to David Shields for designing, and the whole costume team for being a crazy awesome bunch!

Monday, 6 November 2017

Snow White: Part One

I'm in the midst of the final rush for this year's panto at the Mercury Theatre; 'Snow White'.  I realise that I only ever seem to blog about panto-related work on here, I promise I do make other costumes too!  This year I was tasked with making 5 costumes for the dame (called Nurse Nellie in Snow White), as well as 8 animal costumes for the junior chorus (2x mice, 3x squirrels, and 3x rabbits), and a number of headdresses for several characters, including Nurse Nellie, the Enchantress, and Muddles.

I've been onsite for the past two weeks; doing fittings and putting the finishing touches into the animal costumes.  I'm now back home and I've got two weeks left in which to finish all the dame costumes, and then I'm back onsite for tech week, so the pressure is on!

No pretty finished pictures to show you, but here's a sneak peek of some of the things I've been working on in the last few months.


Thursday, 21 September 2017

Dick Whittington: Pantomime Rats - Varaform heads and foam tails

I started this blog entry last year when working on Dick Whittington.  This year I'm using almost identical techniques to create rabbits, squirrels and mice costumes for Snow White, so I thought it was about time I got around to finishing and publishing this!


Our King Rat broke the panto mould by not having any distinguishing ratty features; the closest to that is furry cuffs and lapels on his jacket.  Instead he was the 'Ratty King', with a band of rat minions.  The rat troupe consisted of 2 adult performers and 8 ensemble (played by children aged 8-16); meaning 10 costumes altogether.

Design by David Shields.

I was given (after hinting broadly about how much I wanted to do it) the task of figuring out how to make their heads and tails.
The heads sit fairly high on the head, so I came up with a scheme of mounting them on hard hat innards.  To create the head shape I decided to have a go at using varaform for the first time.  This is an open weave thermoplastic that becomes mouldable and sticky when heated.  To create a mould I layered bubblewrap over a wig block; securing it in place with packaging tape.

Here it is with cardboard ears temporarily attached to check the proportions.
Moulding the varaform.
The guides I found online suggested laying strips in a tray of just boiled water, then pressing them over the mould when they've softened.  I found that, in practise, the strips stiffened again within seconds of leaving the water, thus not giving me enough moulding time, and it was annoying to have to constantly boil more water to replace it as it cooled.  I quickly scrapped that method and turned on the steam iron.

A good industrial steam iron was more efficient, as you can direct the steam as you go; reheating areas where it needs it more, but I eventually found a third method even simpler; a hairdryer.  Once again it was much easier to direct the heat, and to turn it on and off as I needed it, rather than waiting for a hot water tank to heat up.


Once the varaform was cooled I could take it off the mould.  As there were undercuts in the mould this meant cutting a slit on the underside of the nose and partway up the CB before I was able to shift the cast off.  I could then patch up those slits with more varaform, squashing the cut edges together with my fingers where they overlap to strengthen the bond.

The varaform attached to the hard hat innards with cable ties.  These are threaded through the holes in the varaform mesh.  Once secured, I could also trim the excess varaform away.

A pile of rat heads waiting to have their ears covered in pink felt.
I attached all fabrics with hot glue.  The teeth are made from two pieces of foam sandwiching a loop of wire that runs through the varaform mesh to secure them in place.  Whiskers are lengths of fishing line.

Completed rat heads.
I made the tails from pipe insulating tubes.  These are hollow in the middle, with a slit cut along the side.  I started by tapering one end to a point to create the tip of the tail.  I then fed a length of wire along the slit, and attached cotton tape over the top to hold it.  I attached a second length of cotton tape along the other side, then made cuts 2" apart along both the top and the bottom of the tube and bent it into a suitably tail-like S shape.  I covered each tail with a double layer of pink lycra and painted into them, emphasizing the segmentation with some watered down acrylic.

Prior to being covered.
Onstage for a dance number!  Furry trousers mostly Corinna & Abbie's handiwork I believe.  Ratty King (centre) costume also made by me.  All designed by David Shields.


Stay tuned for more furry rodent costumes from this year's panto!  Funny how one can sometimes stumble into a specialism...

Friday, 23 September 2016

Jane Austen Festival 2016

I've been wanting to go to the Jane Austen Festival for a few years now, but have always either run out of time to make a costume, or had other things on that clashed, so I kept having to put it off.  This year, as work was keeping me busy, I was once again in danger of waiting yet another year.  Luckily this time I'd planned ahead, and already had a day dress I'd made for myself in June.

I decided to just go for the promenade on the Saturday, so I could at least get a feel for it this time round, and maybe go for a longer period some other year.  I invited my mum along, who was excited to get her own costume, and my dad ended up coming too to take some photos.

I tried rag curls overnight, and they were semi successful.  I just pinned up the ones that didn't work out so they were hidden by my bonnet.  Unfortunately we were rained on for most of the promenade, so the successful curls didn't stay that way for very long.

Putting a brave face on for the rain.

Lucky I was wearing cotton, it dried pretty quickly. 
From behind.  Mum didn't want her face shown, which is why I've cropped her out of the other photos.

After the promenade we had lunch in a nearby restaurant, then checked out the market stalls in the Assembly Rooms.  To be honest, I was a little underwhelmed by the whole experience.  Being rained on didn't bother me, but I feel like, not knowing any of the other promenaders beforehand, the experience wasn't really set up in a way that made it easy to meet people.  We chatted a bit with the people around us before and as we walked, but that was about it.  I think part of it was because there were SO many people, and I'm a naturally introverted type.  I think if we'd gone to one of the events that involved milling around with a smaller group of the same people for a few hours, that would have helped a lot with the social aspect.
I really enjoy the Prior Attire Victorian Ball - and the group dances and circular tables for eating at all contribute to creating a more intimate atmosphere where it's easy to relax and get to know the other dancers.  So perhaps I should have tried going to the Regency Ball that evening as well... but alas, I had no gown for it!

Oh, and the other thing about being in a Regency Promenade is that it's rubbish for costume admiring!  All I could see were the ones in our immediate vicinity.  Oh well, you live and learn.  I'm glad I went, and I won't rule out going another year, I'll just have to try out some of the other events besides the promenade.

In costume news I've decided that I do actually need some regency stays to wear with this.  I thought that, being small busted, I could get away with just a bodiced petticoat, but because there's no lift whatsoever it just leaves the front of my bodice looking a bit sad and droopy.  Not the best look.  I also feel like the bonnet suited a later period than the dress, so that'll have to be rectified at some point too.  I am happy with the fullness of the skirt in the back though, yay, cartridge pleating!

Sunday, 18 September 2016

Dick Whittington

I'm hard at work on various costume pieces for Dick Whittington at the moment, which is preventing me from doing any historical sewing.  I can't really complain though, as I've been given some wonderful designs and costume props to sink my teeth into.  Alongside costumes for Idle Jack and costumes and wigs for both Sarah the Cook and Ratty King; I've also been asked to make all the rat heads and tails for the ensemble cast.  I've been documenting as I go so will put up a few panto how-to posts once the show has opened.

A sneak peak.

I've also been asked to make some fairy wings, which I'm very excited to have a go at!  I very nearly got the chance to for Sleeping Beauty a few years ago, but the job went to someone else so I've been hankering after an opportunity to give wing making a try.

I've got a Dame fitting on Tuesday that I need to finish a couple of toiles for, but I couldn't resist doing a bit of googling for fairy wing inspiration in my coffee break.

FaeryAzarelle

FaeryAzarelle on Deviantart does beautiful wings made from iridescent film and an aluminium frame.  I don't have access to a water jet machine for cutting aluminium, so I'd be tempted to use a thin cuttable plastic sheet for the veins.  I've seen tutorials of other people using cardstock, but I'm not sure how durable that would be - and this does have to hold up for panto!

A couple of other options:

Fairy Godmother Wings from the live action Cinderella film
A very sophisticated take on the old nylon stretch over wire technique, from On Gossamer Wings
Plenty of food for thought, but now I must get back to Sarah's oversized sleeve puffs...