The pagoda costume ended up being the mad-panic-job at the end (there's always one). Initially I was only making the wig, but about halfway through production I was asked if I'd like to make the structural elements of the costume as well, and I couldn't resist...
 |
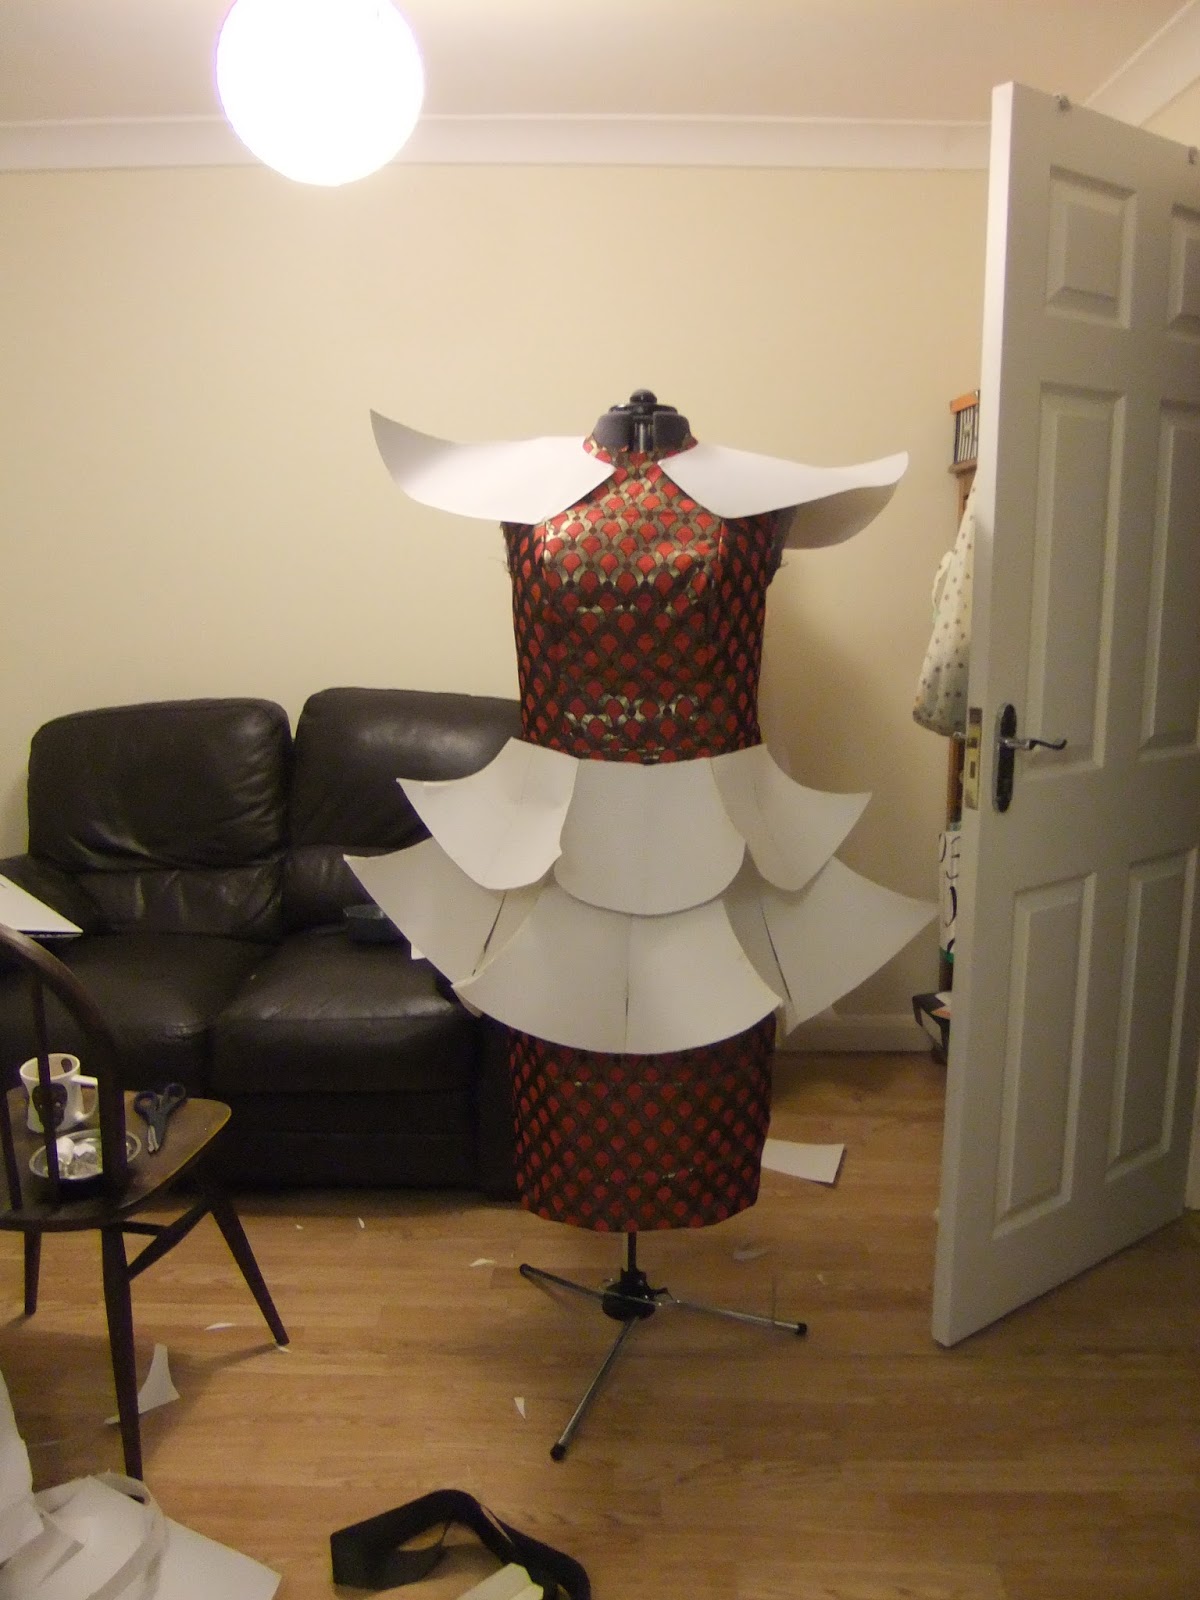
| Mocking up the collar and skirt in card. |
 |
| Finished skirt patterns. |
 |
| Cassie checking out the fosshape. For the wig bases I always steam fosshape over a head block, but for the costume panels I stiffened the fosshape first with an iron, before cutting it into the skirt panels and collar. |
 |
| I'd included an overlap seam allowance on one side of each panel, so they could be secured together with a zigzag stitch. |
 |
| The pagoda headdress came together fairly similarly. |
 |
| Here you can see that I glued in a square base on each tier, for the pillars to stand on and support. The pillars are the kind used in a tiered wedding cake; spray painted red to match the fabric. |
 |
| All fabric attached. Most of this had to be pieced together from scraps, as I was very low on fabric by this point. |
 |
| Trimmed and ready to go! |
 |
| The completed costume! Excuse the unpressed dress fabric, these photos were taken about 5 minutes before the courier was due to collect them |
The collar attaches to the dress with two poppers in the front, and one at the CB, as well as a hook and eye fastening at the neck.
The skirt has a hidden waistband with a side seam opening, also fastened with poppers.


No comments:
Post a Comment